AI Agents are the talk of the town! Whether you’re a tech enthusiast or a curious creator, exploring the real use cases of AI Agents has become a captivating trend. Based on my experience using the Agent.ai platform, here’s a simple step-by-step guide to understanding, learning, and building your own AI Agent.
Step 1: Understand What an AI Agent Is
Before diving in, it’s crucial to grasp the basics. Learn more here:
👉 What is an AI Agent?
Step 2: Try AI Agents Built by Others
Explore some fascinating AI Agents created by other users. It’s a great way to spark inspiration!
👉 Agent.ai Showcase
Step 3: Create Your Own AI Agent
Now comes the fun part—building your AI Agent! Let’s dive into the process step-by-step.
How to Create an AI Agent on Agent.ai
Step 1: Log In or Create an Account
Start by signing up or logging in at Agent.ai.
Step 2: Access the Agent Builder
Navigate to the Agent Builder tab and click Create Agent. You can choose to start from scratch or use a template.


I personally created the Midwit Meme Maker from scratch (see it here), but let’s explore a template this time—Chat with a Website.
Step 3: Configure Your AI Agent
Head to the Settings tab to customize your agent:
- Agent Name: Give your agent a unique and descriptive name.
- Agent Description: Write at least 100 words explaining your agent’s purpose and functionality.
- Agent Username: Choose a username for your agent.
- Icon: Select an icon that represents your AI’s purpose.
- Sharing & Visibility: The default setting is private, but you can make your agent public whenever you’re ready.
- Expected Runtime: Adjust based on your agent’s processing needs. For instance, generating images might require longer runtime.
- Tags: Add relevant tags to help categorize your agent.

Step 4: Define Trigger
Set the trigger mechanism for your agent based on its use case. Free users might want to avoid scheduled triggers to conserve points.

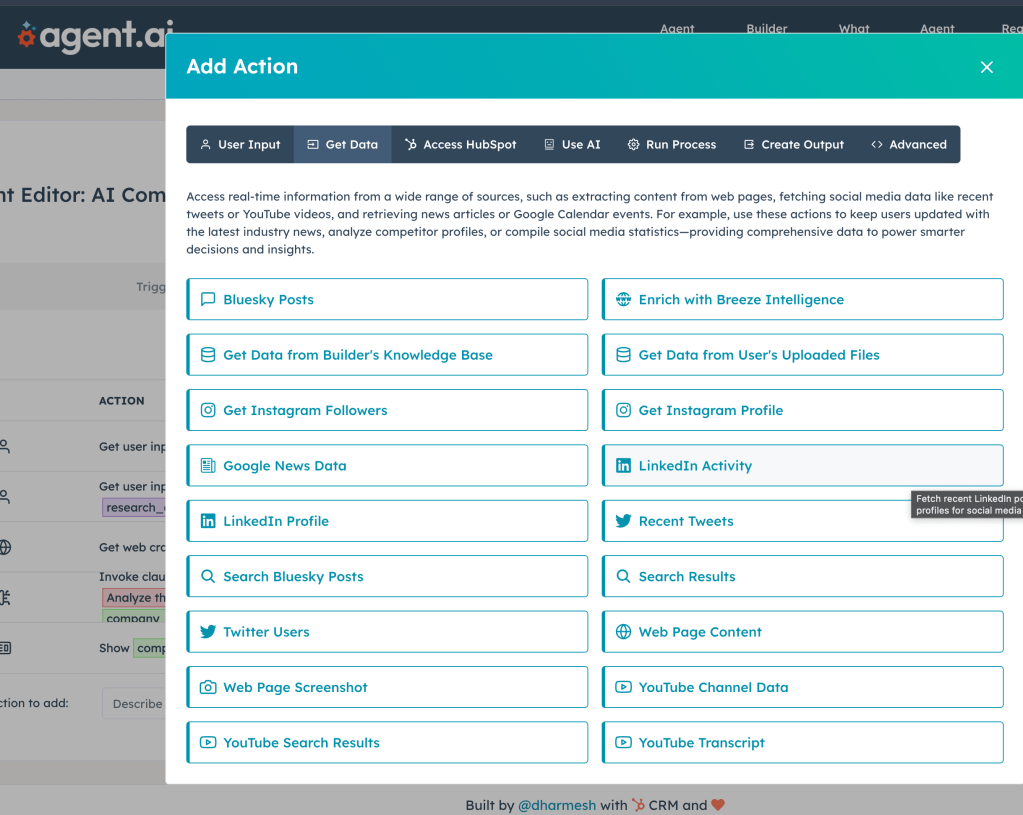
Step 5: Add Actions
Use the Actions page to design your agent’s logic. Here, you can test outputs with the Preview tool. If something doesn’t work, the Debugger is incredibly useful to identify the step causing issues.

Step 6: Sharing Options
Decide who can access your agent. This tab lets you define user permissions and visibility.

Step 7: Explore Advanced Features
If needed, tweak additional settings in the Advanced tab.

Step 8: Test and Run Your Agent
Once everything is set, hit Run and test a few use cases. When your agent is ready, you can make it public. Public agents go through an approval process before becoming accessible to others.

Additional Tips
- Get Bonus Points: Link your Agent.ai account to Twitter (X) to earn 50 bonus points for more trials.
- Approval Process: Public agents may take a few days to get approved. In the meantime, you can keep testing and refining your agent privately.
Create, Share, and Inspire!
Building your AI Agent is a rewarding experience. I’d love to know what you create! Share your AI Agent with me, and let’s explore the endless possibilities of AI together.


Leave a comment